It has been previously noted that I prefer to demo a room in a more controlled manner than you may have seen on tv shows on the DIY network, or HGTV. On those shows, the host grabs the homeowner, hands them some sort of beat-stick (crowbar, hammer, sledgehammer, baseball bat…any heavy blunt object really) and says “here, throw this hammer through that window!”
(Side note: man, that makes me think of the bowling ball scene in ‘Dazed and Confused’ – “that bowling ball did NOT go through that damn window!”)
Inevitably, that hammer DOES actually go through the window. The sledgehammer goes through the drywall. The baseball bat goes through the tile on the wall (and then severs the ligaments of the homeowner swinging the baseball bat, an aspiring minor league pitcher. Whoops. Did anyone else see that episode of Bath Crashers?) Then the show does a little cut to what appears to be thirty seconds later and there is no mess, and the area is nice and tidy.
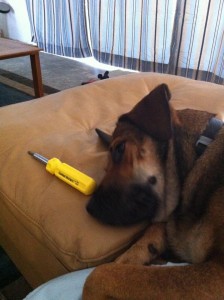
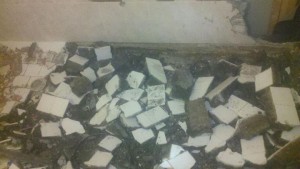
After having demoed (real word?) a kitchen and now a bathroom, I can tell you that the ratio of “demo time” to “clean up that mess” time is roughly 1:47. When you use a big whackin’ stick to break stuff in a “fun” manner, it makes a HUGE mess. When you take your time, use smaller tools, and pre-cut the drywall, it makes less of a huge mess. The Girl and I don’t have a squad of thirty workers waiting just off-camera to clean up after us. We have The Dog. The Dog, while furry and energetic, is relatively useless where home renovations are concerned. Exhibit A:
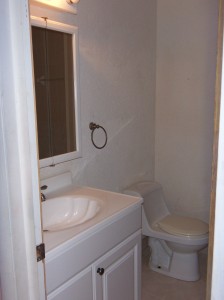
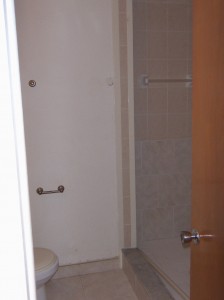
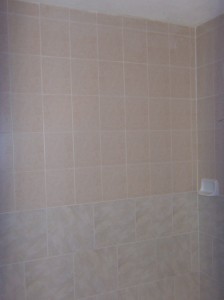
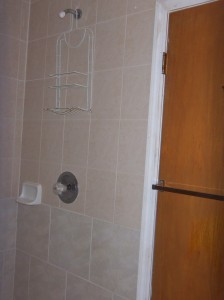
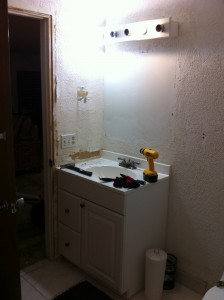
That being said, let’s talk about the bathroom. Ironically, this was the NICER bathroom in the house, but didn’t really have a working shower, so it had to be the first to go. Let me clarify. It DID have a shower, but that shower was approximately 5 feet wide and 137 feet long. Someone, at some point, took a perfectly good closet and knocked out some walls, put down some tile (poorly, I might add) and threw up a shower spout. Except the shower spout leaked, and because there was only one spout, and the shower was so humongous, the back two-thirds of the shower were really useless unless you wanted to just stand there and watch the water fall out of the spout and not actually get wet. Here are some photos:
So…DEMO! (controlled, of course)
First, we had to remove all of the fixtures. The sink, vanity, toilet, and light fixture. Less sledgehammer, more screwdriver. I got a fever, and the only prescription is more screwdriver, am I right?
Next, the shower. For this, we bothered the neighbors. Let me first say that our neighbors are terrific. They edge our lawn (because we don’t have an edger), they fixed our hose after the OTHER neighbor ran it over with a lawnmower, they were very gracious when The Dirty Dog dug under the fence and into their yard, and they lent me a pneumatic hammer for the bathroom demo. It’s loud.
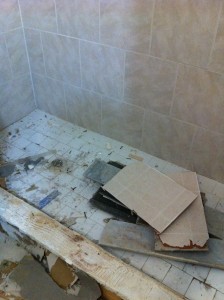
The concrete pad that was poured for the shower broke up pretty easily, but it was obvious that water was getting below the tiles as the concrete was very damp. So, after about two hours with the hammer, there was a pile of busted tile and concrete where a shower used to be. And, according to the ratio previously mentioned, there was approximately 94 hours of clean-up to look forward to.
Through the magic of the interwebs, we skip past the clean-up, and go straight to removing the drywall and wall tiles. Admittedly, there was a bit of uncontrolled demo going on for this. The drywall behind the vanity area, and the toilet area, came down easily. Put the claw end of the hammer through the drywall, pull, make progress. Pretty simple.
However, the portion of the walls that were tiled and that made up the shower had a wire mesh layer that was attached to the wall studs. This means that the claw side of the hammer would have to make it through the tile, the concrete backer board, and then the wire mesh. Not likely, even with an uncontrolled swing of the hammer.
Instead, I managed to make a small hole in the wall after repeated strikes in the same spot. Tile flew, concrete dust was inhaled, wire mesh was torn. From there, using a hammer in each hand, I put the claw side of the hammers into the hole, and pulled. This usually resulted in one or two tiles coming off the wall and shattering at my feet. It also made small progress with the underlying wire mesh.
Sound exhausting? Yep. Took about three days, working a couple of hours a day, plus the clean-up. Let’s just say that I’m pretty sure the guys who pick up our trash were tired of having to lift the trashcan that was full of concrete and tile.
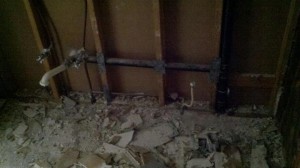
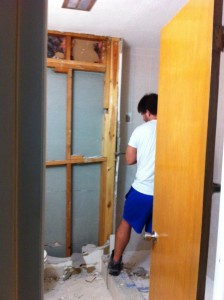
When we were done, our bathroom looked like this:
Kinda scary actually. Breaking stuff is REALLY easy. It’s also fun. It has an element of instant gratification. But then you realize “holy crap – this bathroom was ugly, but it WORKED, and now…it’s concrete, framing studs, and pipes.” Small moment of terror, but nothing compared to what was to come.
You may be asking yourself, “what WAS to come?!” Let me just tell you that neither The Girl nor I have any previous knowledge about home repair. What you see is what we’re learning. So, when Miguel, our own personal DIY guru, said “you gotta get a jack-hammer and bust through the concrete so you can move the tub/shower drain,” we were a little apprehensive. Again, putting a hole in the floor? No problem. Fixing aforementioned hole? Uh…
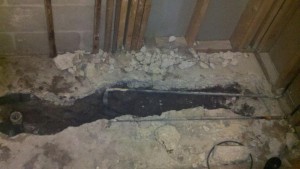
So, The Girl and I rented a 60-lb jack-hammer from Home Depot. Use Home Depot for many things, but if you can avoid it, do not rent tools from them. Find a local rental place – it’ll get you WAY better rates, and service. Unfortunately, it was a Sunday, Miguel’s time was running out, and we needed to make progress, so Home Depot was the only option. In about twelve seconds the jack-hammer turned a perfectly good six to eight inch thick concrete slab into rubble. Plus there was now a hole in our house.
A hole. In the house. “Hey, what’s in this room? WHOA! Did you guys know there’s a HOLE IN YOUR HOUSE?!” Like I said, scary.
Once we finished with the jack-hammer, the demo of the bathroom was essentially complete. (FYI – we kept a lot of the concrete rubble so that we could fill the hole back in with it before pouring in concrete. It created a more stable base and saved us a little money in concrete. Another great tip from Miguel!) We had some drywall screws to take out of the framing studs, and clean up (get yourself a wet/dry shop-vac if you’re doing any demo – they’re cheap and SUPER helpful), but other than that we were ready to start putting the bathroom back together.


You two are amazing !
You did a great job with the demo. Wire mesh is the worst to remove-arghhh! And I agree with your ratio, it always takes more time to clean than demo.
Pingback: Move. That. Drain!!!! | Pardon Our Sawdust
Pingback: What Wood You Do? | Pardon Our Sawdust
Pingback: Demo = YAY!!!! Controlled Demo with The Boy = yawn. | Pardon Our Sawdust
Pingback: Lawdy Dawdy, We Likes to Potty | Pardon Our Sawdust