Cover Your Winders

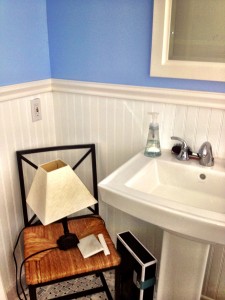
I made curtains! Sort of. We have a lot of naked windows in our house, and quite frankly, it is inappropriate.

So embarrassing.

So embarrassing.

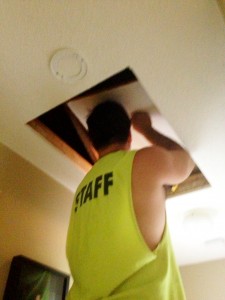
It took a few months to get blinds up, but it has taken much longer to make respectable window treatments. Suffice it to say that working toilets were more of a priority. We have been stalled on the second bathroom renovation since we have gone as far as we feel comfortable without Miguel’s supervision, and he is obviously busy with the holidays (as are we). So at some point in January Miguel will come over for ribs and his favorite kettle-cooked chips, and will guide us through the process of disconnecting the power main, cutting the metal sheathing to shorten it about 6 inches, and moving the breaker box over so it sits in the new wall we are building. If none of this makes sense, don’t worry – we don’t understand either.

I found a curtain on clearance at Target, which I thought would be perfect for the kitchen.  The only problem was that it was one huge panel, and we have one small window.
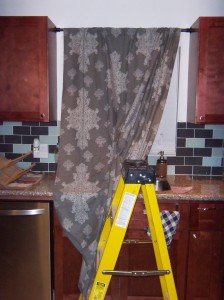
Exhibit "A"

Exhibit “A”

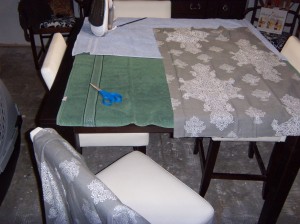
I’ve read several tutorials on no-sew hem tape, and figured it was worth a shot. First I had to locate the iron and dust it off. Then I realized I had no ironing board, so I improvised by covering the dining room table with towels.

Curtains

When The Boy read this post, he said, “Sweetheart, you probably shouldn’t be using that table as an ironing board,” at which point I realized that I had done this while he was gone and did not plan on telling him. Oops!

Then I laid out my panel, and decided to first cut it to length.  That way, when I separated it into two panels, they would both be the same length. I measured the window, figured out where I wanted the curtain to fall, and made little marks on each side of the curtain.

Curtains

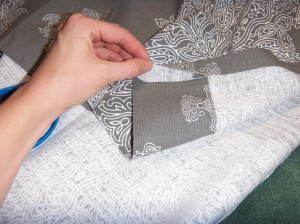
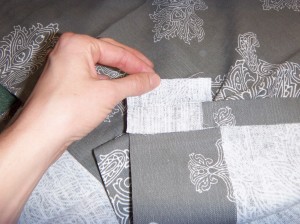
Then I cut it, and used the tape and iron to “hem” it. This worked surprisingly well!  The bond was very strong and I was pleasantly surprised.

Curtains

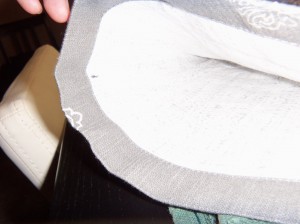
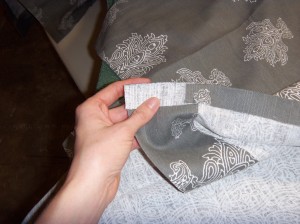
Next I cut the large but shortened panel in half lengthwise, to make it into two shortened panels. This was pretty easy, since I folded it in half and cut along the fold. By this time I was a professional hem tape user. One minor complication I did not consider in advance was the sealing of the entry point for the curtain rod.

Hmmm.

Hmmm.

A few snips of the offending material, and it was ready to go.

CurtainsCurtainsCurtains

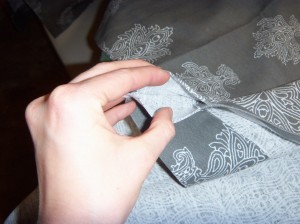
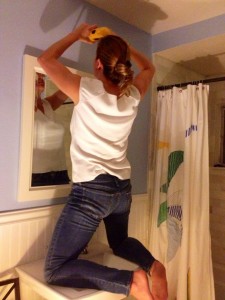
I was also surprised when I held it up to the window and realized that I marked where I wanted the curtain to end, and did not account for the ½ inch or so of folded over hem.  Oops again. Luckily, I had devised a very lazy scheme of hanging the curtain, which involved a spare shower curtain tension rod placed between the two cabinets on either side of the sink. I moved the rod down ½ inch, and bam!

Curtains

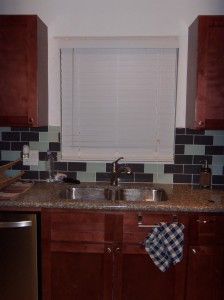
Ignore all of the strange items in the sink. I have no idea what was going on.

Lazy + Ingenuity = Perfection. That is MY version of mathification. I am also happy to report that this will be the last crappy picture I will offend your eyes with. (More on that tomorrow!)

This entire project took about an hour, which is not bad for a beginner who does not excel at measuring, cutting in a straight line, or ironing. I think it is a huge improvement, and it might be the most decorating I’ve ever done. All in all – quite a success.

Mobile POS – Bathroom Light Edition

A friend in need is a friend … who better have beer and pizza.

Having “mastered” electrical wiring, it became obvious that The Girl and I needed to share our gifts with the world (a/k/a use someone ELSE’S house as a construction zone for once).

Our friends Joey and Christine recently renovated their bathroom. It looks very nice, and they are quite happy with the results. The only problem is that during the demo phase, the wires to the ceiling lights were cut and taped off in the attic. This also caused an unanticipated problem of disconnecting the light to one of the walk-in closets in the master bedroom, which is obviously on the same circuit. The family was using a tiny table lamp on a chair to have light in the bathroom, and Christine was wearing the same few outfits for weeks since she couldn’t see in her closet. The Girl knows how much I enjoy spending time in attics, so she quickly volunteered my services as an electrician.

Hutchings Bath 1 Hutchings Bath 2

DISCLAIMER: I know VERY little about electrical. What I do know, I learned from a summer science class (taught by my mother) and from Miguel. Recently, I called my mother with an electrical question – she promptly told me that she had no idea what I was talking about, and not to mess with electrical wiring in the house where The Girl, The Dog, and I were living. Bah. Miguel said go for it.

So, I showed up one evening to our friends’ house and promptly got to work in the attic.

Hutchings Bath 7

Four hours later, and VERY frustrated, I left with my head hung low and covered in sweat and fiberglass. I hate fiberglass.

Several days later, The Girl joined me in another trip to the house. I thought I’d had an ephiphany, but judging by the results, it was probably just indigestion. I climbed back into the attic, hauled up all the tools, and spent another three hours sweating and cursing.

Hutchings Bath 6

Meanwhile, The Girl broke out the cordless drill and started putting holes in the walls so we could run electrical wires from the attic down the walls and into the wall sconces that our friends picked out. This would have worked out just fine if there hadn’t been a 2×4 running through the wall at one point which I couldn’t drill through.

Holes in the wall? Yeah – that’ll happen when you “hire” your friends to do weekend electrical wiring. The Girl abandoned the previous “one light on each side of the mirror” arrangement and moved to the “one light on top of the mirror” arrangement.

Hutchings Bath 4

Except, yours truly couldn’t figure out the wiring. Cause I’m not that smart, and probably shouldn’t be wiring ANYONE’S house, let alone the house of a couple we both LIKE, who have two kids under 3. Stupid electricity. Day 2 ended with a minor success: I managed to get the master bedroom’s closet light to work, and the fan in the master bathroom working. Score: minor victory.

Day 3. Yes, another day. In the attic. Doing electrical work, for which I am COMPLETELY unqualified.

OK, it is the same picture. But this is what I looked like again!

OK, it is the same picture. But this is what I looked like again!

Except this time I called Miguel on the way over. THIS time I explained the wiring to Miguel. THIS time Miguel said “Oh, just wire it like this.”

God bless Miguel.

Turns out the light was wired “switch-leg” at the switch. Once explained to me, it made a LOT of sense. I only had to spend about 15 minutes in the attic this time.

Hutchings Bath 3

Holes for two sconces? What holes?

View the splendor! Behold the majesty! Honestly, this was one of the most rewarding DIWhy Not moments I’ve had. Mostly because I was working for someone else, and at the end of the day, I wanted to make them happy with what I’d done. They were super encouraging, provided consolation in the form of beers on the days I was unsuccessful, and congratulations for the last day’s triumph – also in the form of beers. The Girl supported me the whole time, and even joined in on the fun. One lesson learned is to bring your own tools, because not everyone has an entire two car garage full of random tools scattered everywhere. The Girl asked for pliers, and was given these:

Hutchings Bath 5

Pinbusters – DIY Air Freshener Refills

Have you ever wondered if the stuff people post on Pinterest is true? Well I have, and I test them all so that you don’t have to, ’cause ain’t nobody got time for that.  Click here to check out all of the pins I haven taken on. You might be surprised by some of the results!

This might be the most straight-forward pin I have ever tested. Noses don’t lie, says The Dog. This pin talks about all of the harmful chemicals in those liquid air freshener refills, calling out no brand in particular. I have a bunch of the Air Wick air fresheners around my house, and I often buy the refills, which aren’t cheap. Therefore, while my motives were fiscal in nature, and I don’t think my face is going to melt off from any of the chemicals, it certainly cannot hurt to eliminate some chemicals from my life. (Click here for a link to the Air Wick ingredients page – propane?! Maybe I should be a little more concerned about these chemicals!) The idea is that you can reuse the little containers by filling them with your own concoction, namely some watered down essential oils.

Did you catch that? I am pretty sure a fourth grader could tell you that water and oil don’t mix. Water and essential oil? I am guessing the same result. Still, though, I wanted to know if I could fragrance my house with it. First obstacle was locating essential oils. I searched online, and found that CVS sells essential oils at a reasonable price, so I went there. Apparently the merchandise offered online is not the same as what is offered in the store. Perhaps your website should inform customers of this, CVS!! After wandering the aisles for 15 minutes, I asked an employee, who provided the sage advice that I should just order it from them online. “But I need it NOW!” I pleaded. The girl clearly did not understand my essential oil crisis, and had no sense of urgency about the matter. I was raised to do the best with what you’ve got, and the “ethnic hair” section of CVS yielded this:

Tea tree (ahem) essential oil.

The tutorial tells you to remove the cotton wick which looks very much like a cigarette or a filter or something.  This was harder than it sounds, without destroying the wick at least, because if you tear the thin plastic holding the cotton together, you end up with this:

Possibly effective, but hardly reusable. In my infinite wisdom, I decided to pry off the plastic part holding the wick, using my favorite tool – the butter knife. I put some of my “essential” tea tree oil (which does smell very minty) and “mixed” it with water. I put everything back together and plugged it in in the kitchen. In another empty refill container, I said what the heck, and poured in some Febreeze.

At no point in college or law school, when I was honing my funneling skills, did I think it would come to this. I am officially old. I placed the Febreeze-filled one in the bathroom.

Results? Nothing. If I got my sniffer up really close I could smell a faint scent, but after a few days I could smell nothing. I didn’t really feel comfortable that I had conducted a true scientific experiment, though, for obvious reasons. Therefore, I finally located some real essential oil (at Michael’s, of all places, but of course it is in the store and not available online) which specifically says it is for fragrance purposes.  I put some of my cinnamon essential oil into a holder, “mixed” it with water, and had this:

The olfactory results were … well … underwhelming. I left it in for a few days and could smell absolutely nothing. In a final last ditch effort to get some results, I filled the entire container with nothing but essential oil. The final result can best be described as “eh” with a shrug. I could smell it, but WAY less than my actual Air Wick refills. Also, from a cost effective standpoint, the essential oils are more expensive if you use an entire bottle to fill the container, so unless your goal is merely to fragrance your home without exposure to the chemicals, this doesn’t make sense.

Finally, I consulted my field guide for all things … well, just all things – Wikipedia. Oh yeah, things are going along just fine until you get to the Dangers section. In fact, skip ahead to it. Apparently everything on earth is designed to kill us, in one way or another. I would like for my tombstone to read, “Her house smelled really good all the time,” so I will continue to buy my chemical-laden refills. And life goes on.  (Note: The Boy was completely and utterly blissfully unaware that any scent-periment was going on at our house.)