Warp Speed Table Transformation

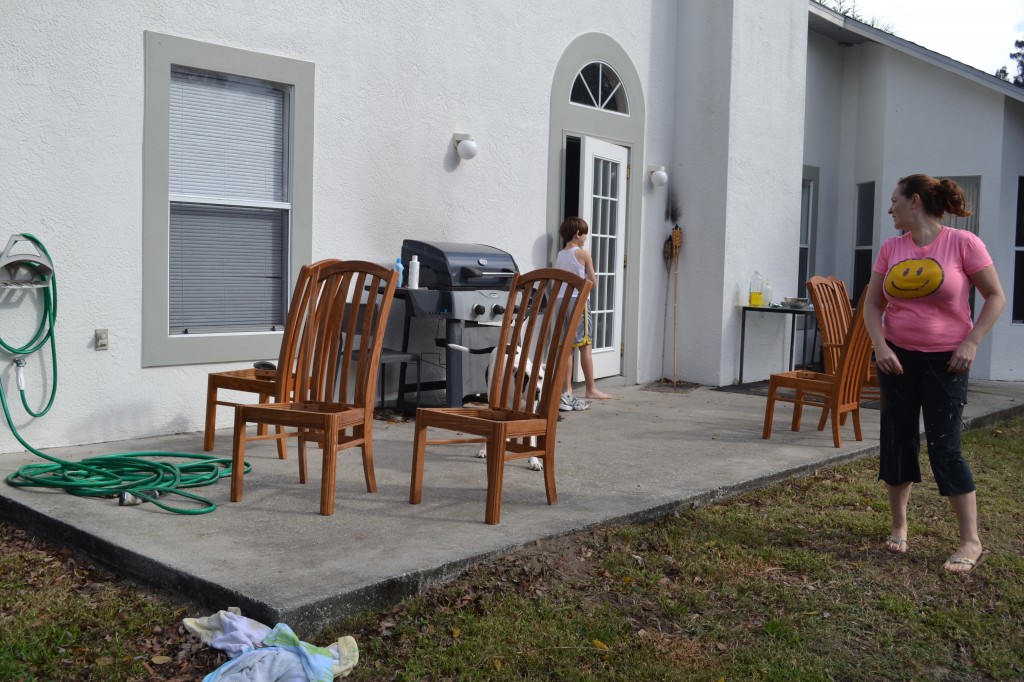
My friend Marty had a problem. She hated her kitchen table, but didn’t want to buy a new one, since there was nothing “wrong” with the dining set, except wear and tear and, well, some ugly. I was due for a visit so I packed up my tools and drove over on Friday after work. We relaxed on Friday night, caught up, played with the kids, and got working Saturday morning. I always underestimate things – how much primer we will need, how long the project will take, how much it will rain, how many blisters I will get, how hard a child can work, etc. We had to sand the table top down to bare wood, prime all of the chairs, paint all of the chairs, prime the base of the table, paint the base of the table, stain and polyurethane the table top, and reupholster the seats of the chairs. In a day and a half. Yup. We were attempting to complete a 4 day project in less than half that time. However, another thing I underestimated was how much we both wanted to finish this table, so we made it happen. We started by taking the seats off of the chairs and dragging them into the backyard, where we sanded them to scuff them up and started priming.

Marty Table

Marty Table

Aaaannnnddd then it started drizzling, so we moved the party to the garage and started sanding the table top. Here is what we started with:

Marty Table

Marty Table

Marty Table

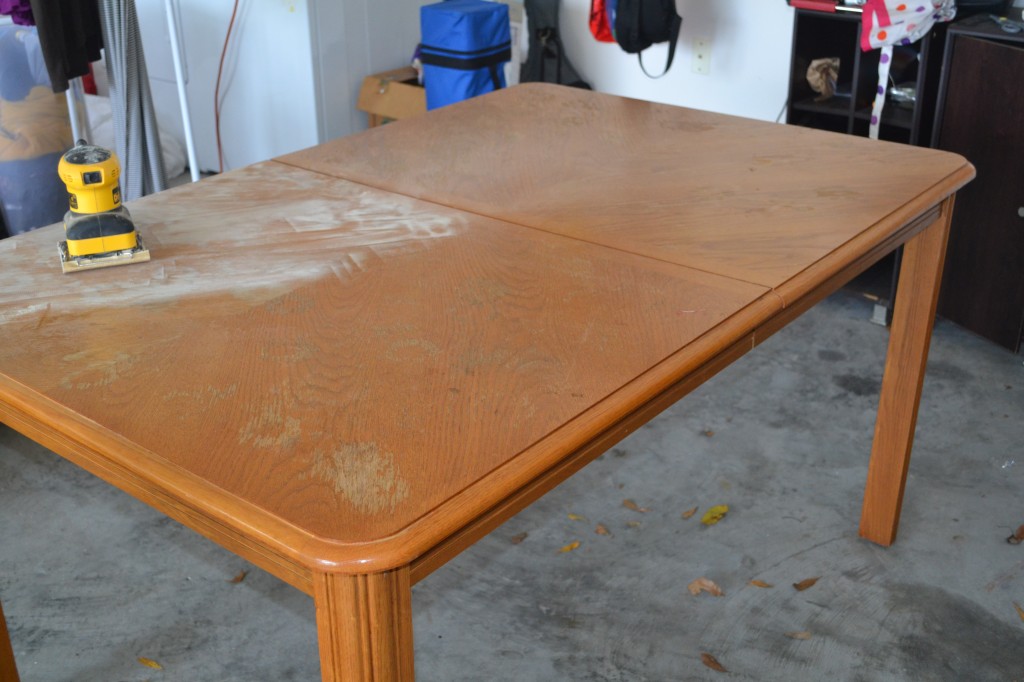
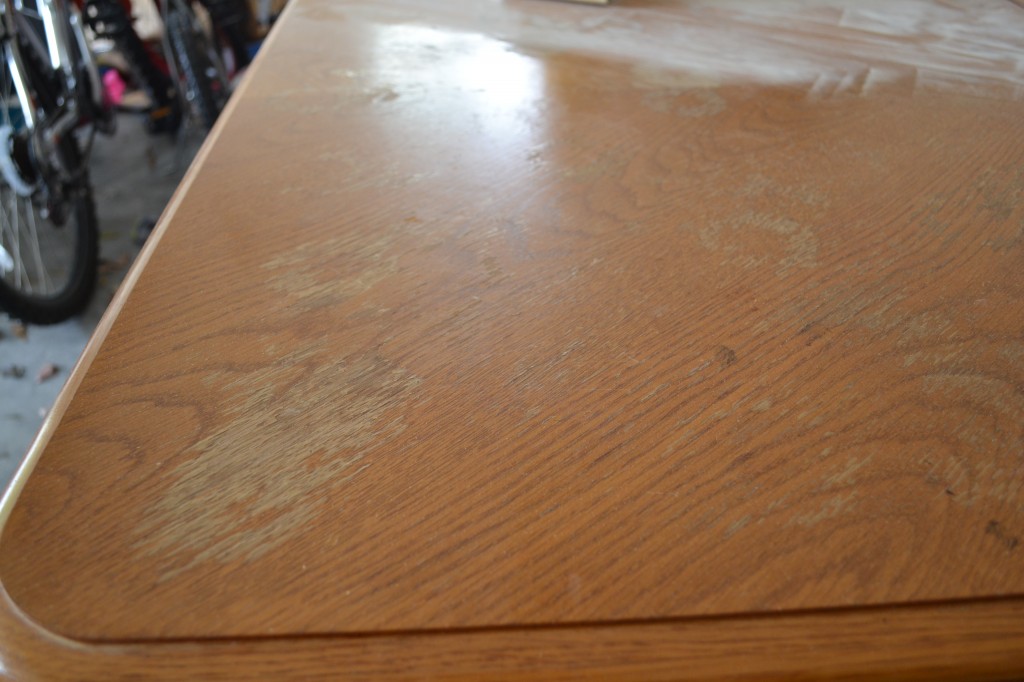
Of course, I forgot to take true “before” photos because I was eager to get down to work. However, I stopped early on in the sanding to document the depressing state of this table. Also, you can see how much priming of the chairs we accomplished before the weather intervened. It became pretty clear that we were gonna need help.

Marty Table

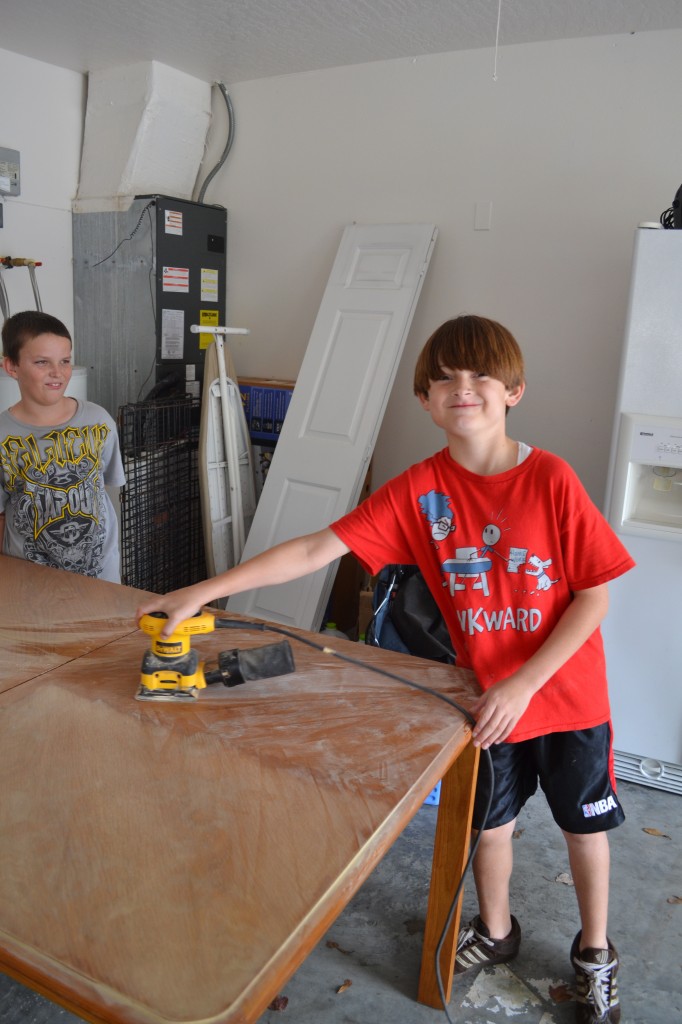
Child labor laws? What child labor laws? Marty’s son and his friend did a great job and followed my instructions perfectly. They might have even had a little fun. Maybe.

At some point we stopped working to take a trip to Home Depot and also to Joann’s Fabric to pick out some material for the new chair seats while primer dried. The rest of the day involved a LOT of sanding, priming and moving chairs in and out of the cover of the garage as it rained off and on. We finished sanding the table top and got two coats of stain on before bedtime. While relaxing a bit and watching TV in the evening we re-covered a few of the chairs. Not a bad first day.

Marty Table

The lighting in the garage made all of the sections look different shades - but they are not!

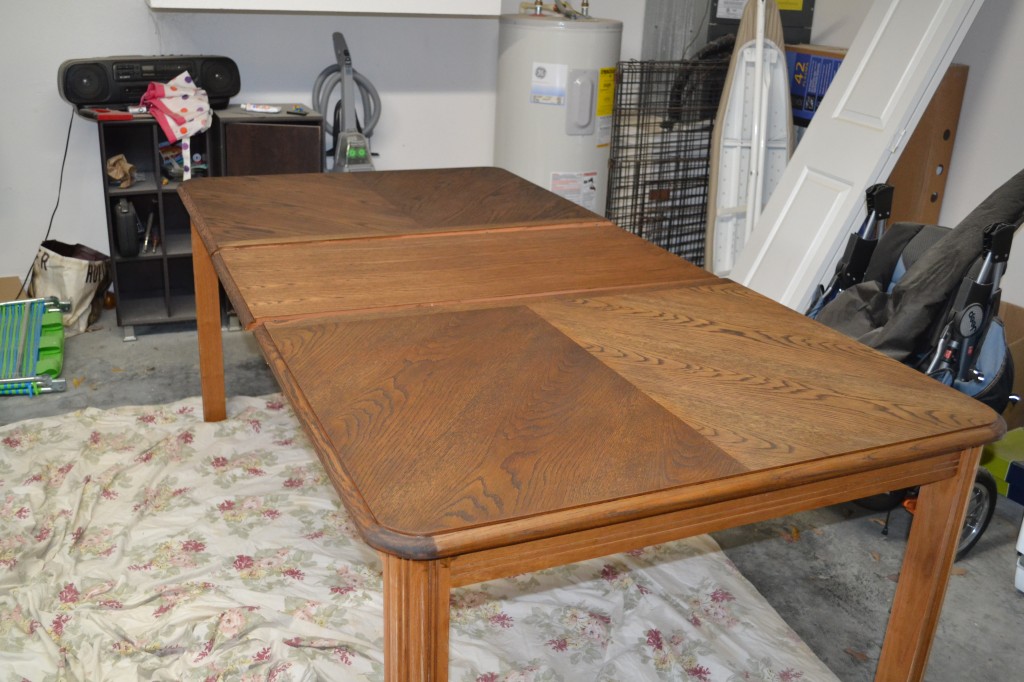
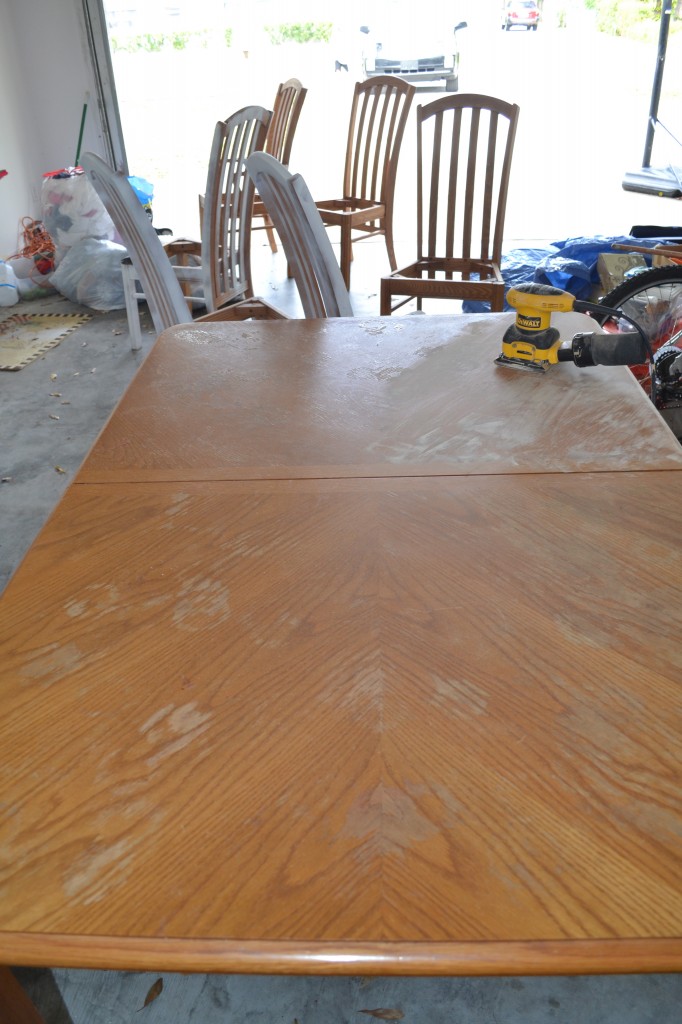
The lighting in the garage made all of the sections look different shades – but they are not!

Marty Table

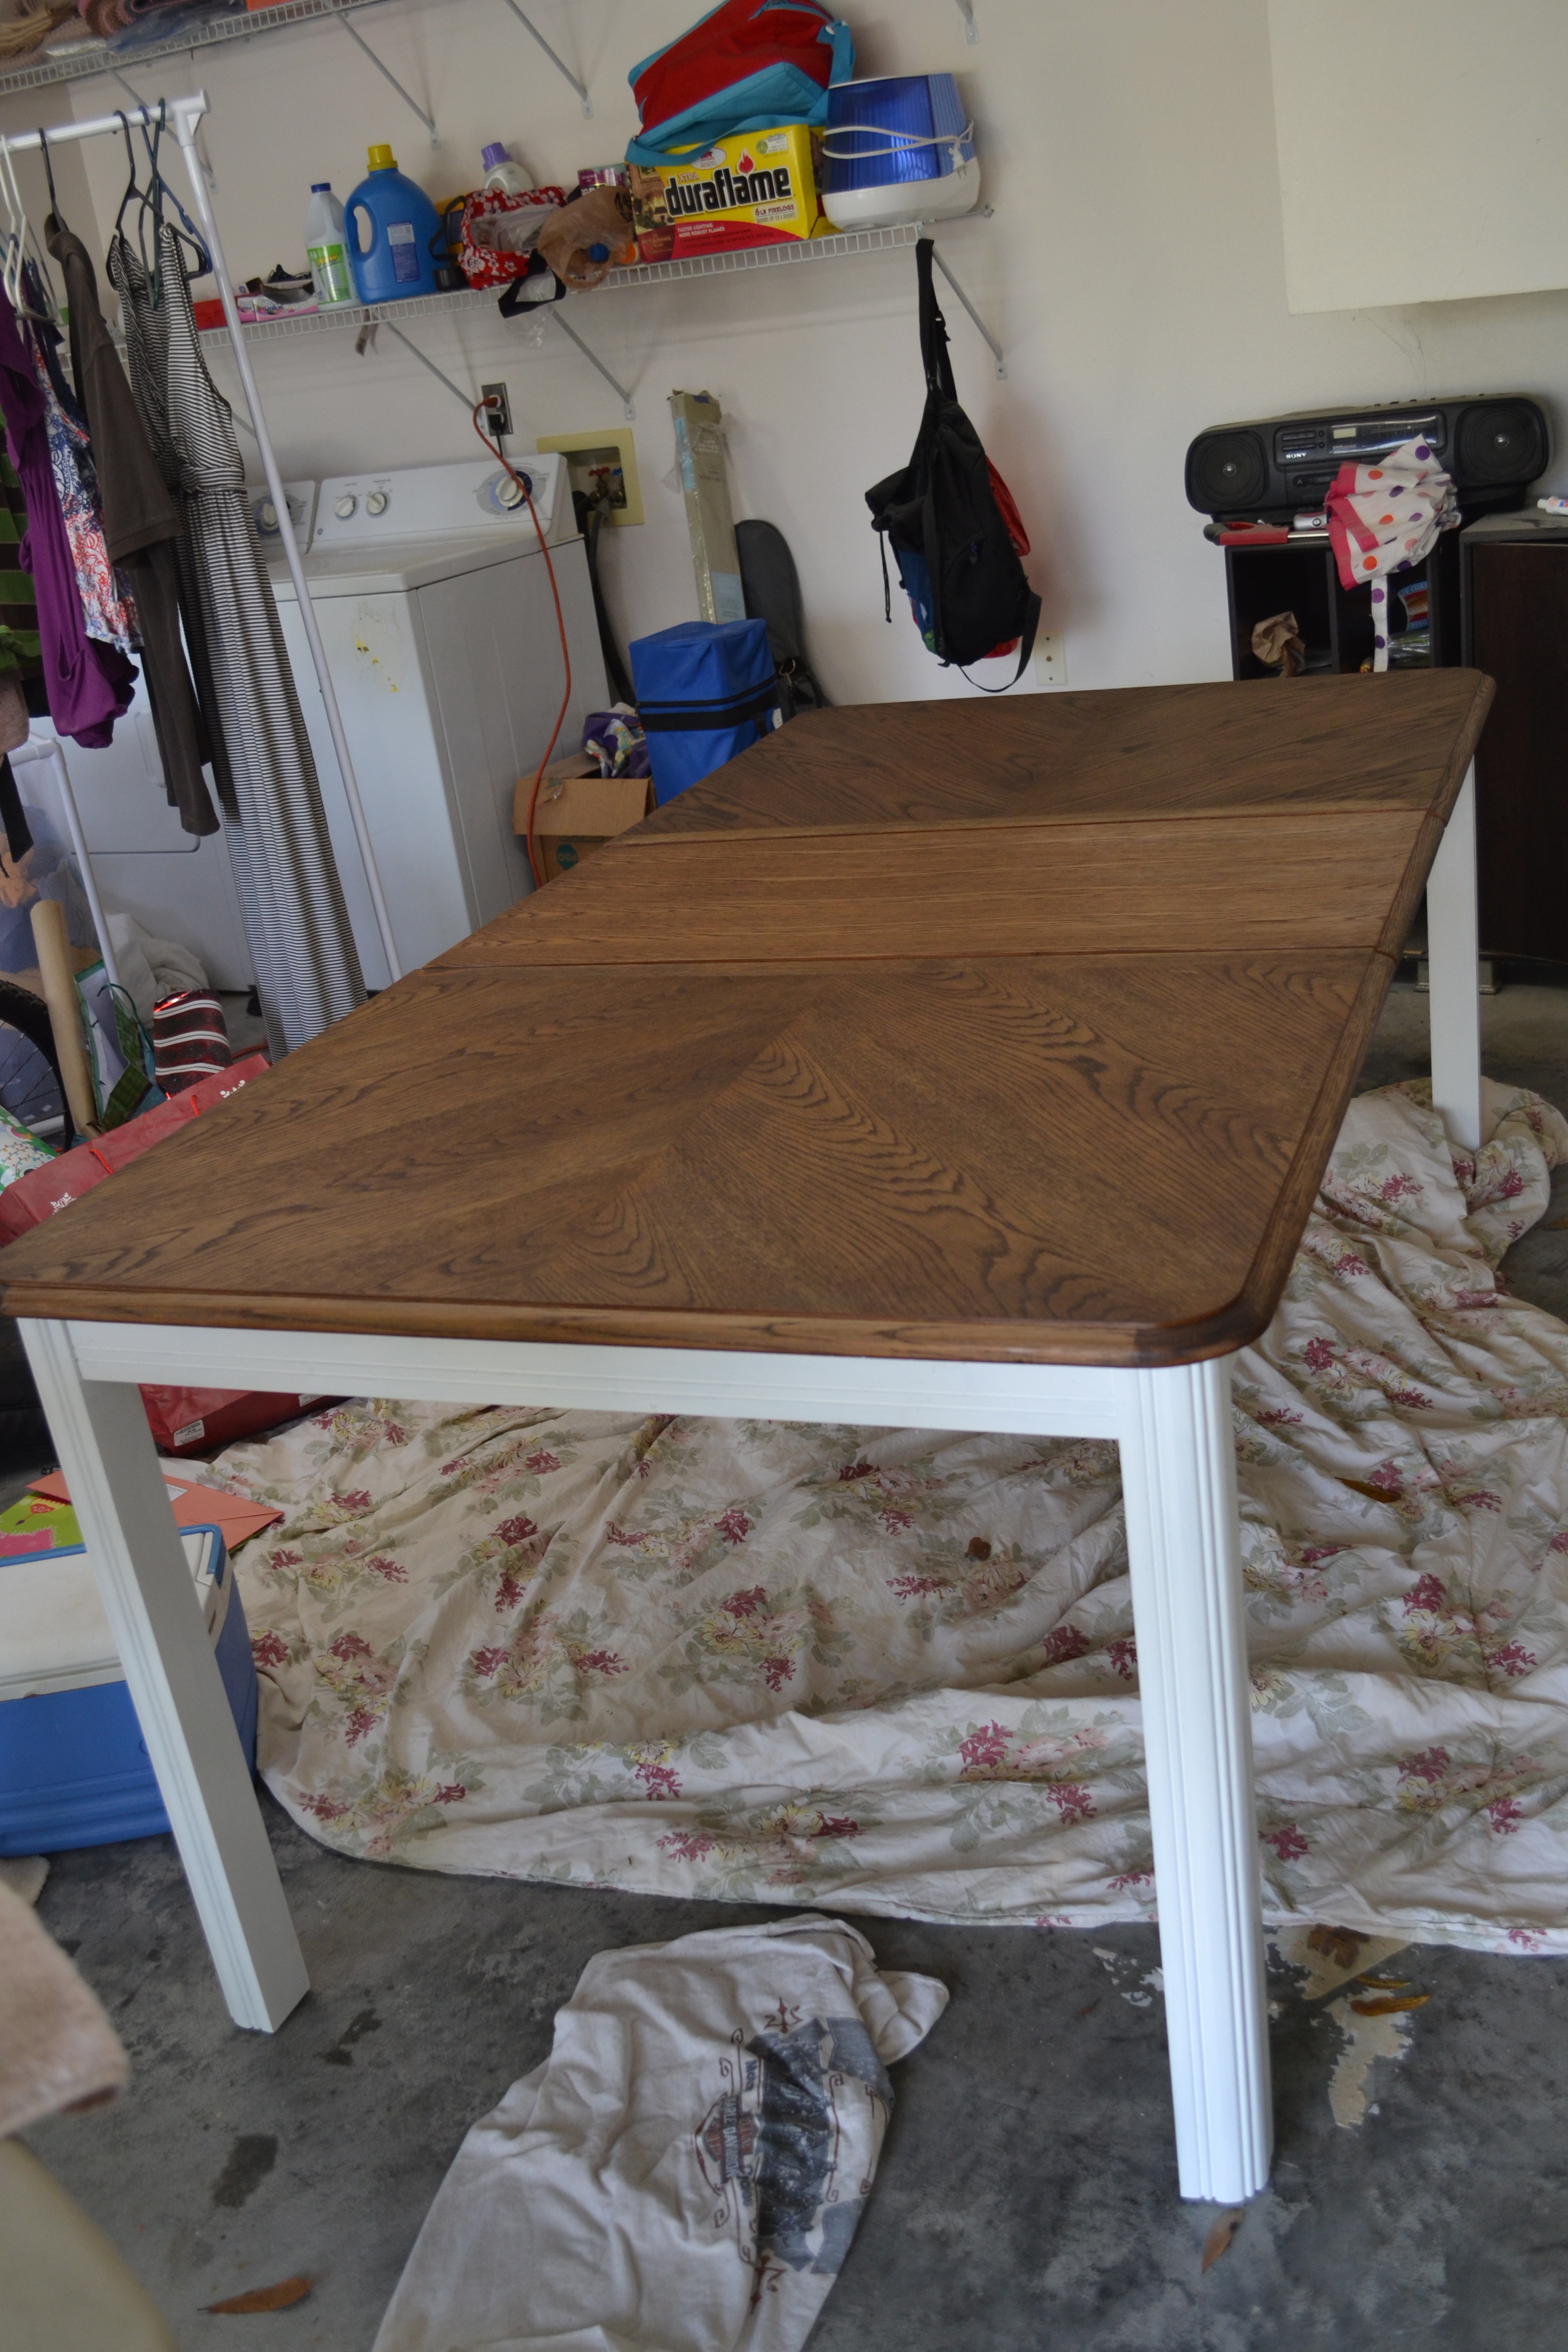
Sunday morning was a little slower. After a cup of coffee or two (or eight), we ventured back out and managed to get a coat of paint on all of the chairs, which took FOREVER. We also flipped the table over onto a tarp, taped it off around the edges, primed the base, got one coat of paint on it, flipped it back over, and put one coat of polyurethane on the top. It was a lot of hard work, but it was really exciting seeing everything come together!

DSC_0023

A few regrets: over-eager sanding which went through the veneer in one spot (it took stain pretty well and isn’t too noticeable, but I still feel bad about it – I can’t even blame it on the kids!) and OIL-BASED PAINT. I understand the benefits of oil-based paint. I really do. But it is NOT worth it when you are painting with a brush into a gazillion cracks and crevices. It was like trying to spread bubble gum onto every blade of grass in an acre using toothbrush. Maybe that is an exaggeration – but not much. Plus, clean up is a losing battle with oil-based paint. We threw away the brushes, and I went to work with paint on my legs for days. I have still a few streaks in my hair too, but I figure I will just look like I am aging gracefully until it eventually wears off.

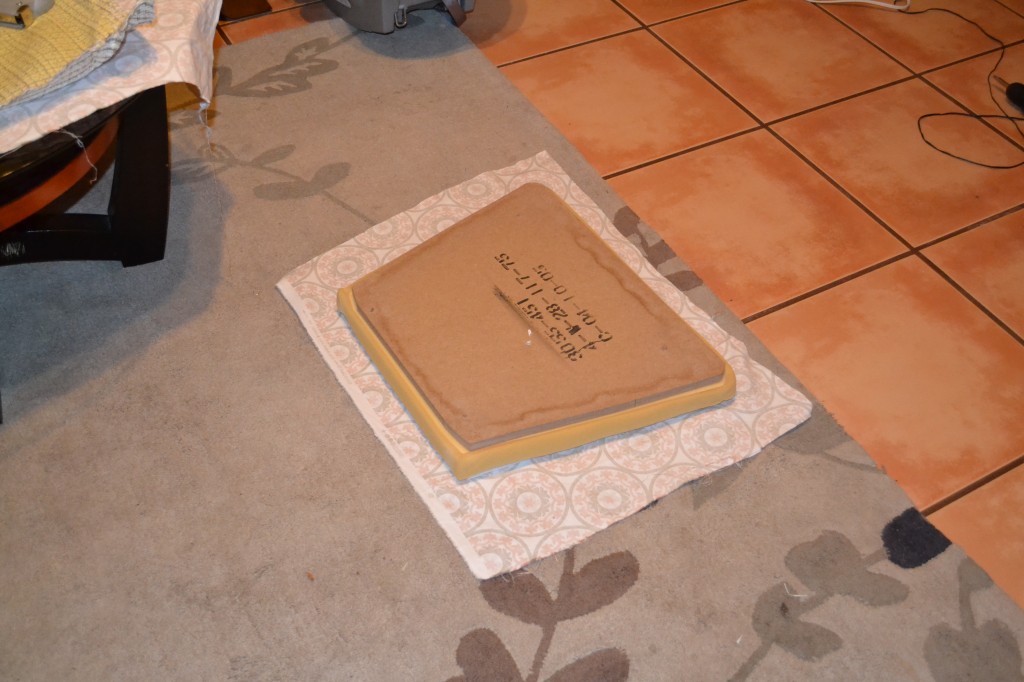
In the late afternoon, we finished re-covering the seats, and then I had to head home. Marty was on her own! She put finishing touches of paint on the chairs, sanded the top of the table and put the second coat of polyurethane on, and re-assembled the chairs. She did a fantastic job! I am impressed that she got it done so quickly, and by Tuesday I had the “ta dah!” photos I had been waiting on.

MartyTable1

MartyTable2

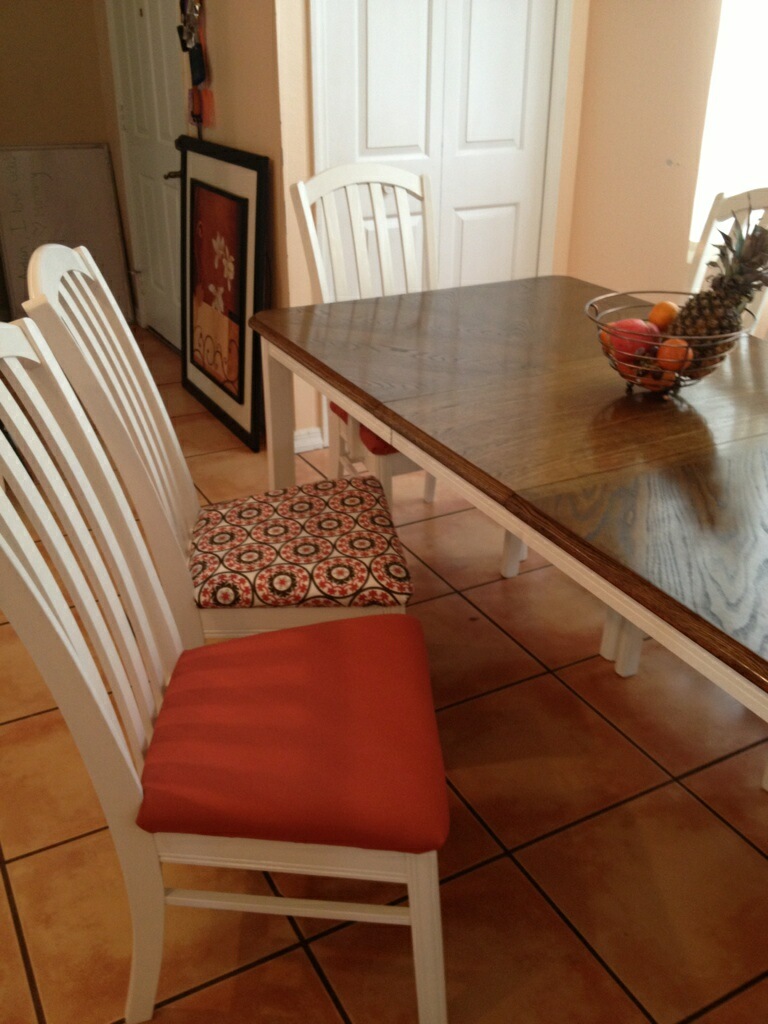
Marty chose to alternate the fabric on the chairs, and although I was skeptical at first, I really love how it turned out. Best of all, she is thrilled with the results and has vowed to stop using her table as a storage and dumping ground. So far so good, right?

I have to end this post with a picture that is oozing with adorable:

Marty's husband, baby, and the neighbor's puppy. Cute overload!

Marty’s husband, baby, and the neighbor’s puppy. Cute overload!

I thought this project would make Marty swear off furniture refinishing, but it had the opposite effect. I am slowly converting people, one at a time! No one is safe … who is next?

Shades of Stain

I was browsing the Habitat for Humanity ReStore one day, as I often do, and a dresser caught my eye. The store employee told me they had just put her out, and I knew she wouldn’t last long. I debated the entire drive home, since we already had so many projects going on, but I loved this dresser! I emailed The Boy to ask when Cindy (the truck) was available, and called as soon as I got home to buy her. Here she is on her way home:

I am not sure why all furniture is female, but that is just the way it is. I always get very excited about starting a new project, and forget to take good “before” pictures, so this is the best I’ve got. Sorry! The back is stamped with “R. H. Macy & Co. N.Y.C” which you might know today as Macy’s. I made sure it wasn’t an Antiques Roadshow make-me-a-millionaire antique, and although it isn’t, it is definitely a neat piece of Americana. The drawers get subtly larger as you go down, and smell faintly of cedar. I really debated what to do with the dresser for quite a while, because the veneer is beautiful, but was in pretty rough shape. Gradient color is very popular right now – I did it with the changing table and really like it – but I thought it would be a shame to paint all of this beautiful veneer. When I inspected further and realized that the drawer fronts were in pretty good shape, I decided to paint the base of the dresser white, and do gradient on the drawers – in stain! Then it was time to work.

I sanded the base just to smooth it out, and sanded the drawers enough to remove the finish, being careful not to sand too much (veneer is thin!). The Boy even got in on the action:

I wanted to see the different stains on the wood to decide which ones to use, so I sanded part of the top of the dresser, and The Boy played bartender.

I was smitten. The base was painted, the drawers were stained, and I swooned. It really turned out great. I picked very small and subtle drawer pulls, so they would not stand out. I took a few pictures without the flash, since it shows the true stain colors better, but then I took a few with the flash.

I love the way it turned out, and I would love to keep it, but we don’t have anywhere to put it. Although I cannot name her, my suggestion to her new owner would be Shades of Stain.

Shades of Stain is for sale!

Meet Madonna

No, not THE Madonna, but her namesake, and the latest member of our furniture family!

We have been working very hard on a furniture project for way too long now, and I am SO EXCITED that it is finally done! The Boy is equally excited, but I suspect for all the wrong reasons. We have an enormous coffee table (seriously big, like 3.5 feet x 3.5 feet), and it slides open to reveal storage.

Hi. My name is Jim.

Would you like me to hold your things?

How awesome is that?? The problem is that we got it on clearance at the Scan Design outlet, it is a beautiful solid teak (haven’t gotten to the actual problem yet …) and everything we like that matches is also solid teak and is painfully expensive. I bought a very long stand from Ikea (in the “scratch and dent” section) as a temporary fix, because it was cheap and similar in color.

And by the way, in case you were wondering, when you purchase something from the Ikea scratch and dent section, and it is already assembled, and you cannot fit it into your car, no one is going to help you disassemble that bad boy. The Swedes do a decent job at telling you how to assemble Bjorn or Skevarkin (or whatever its name is), but there are no disassembly instructions. And why? Because disassembly is impossible, unless you are a rocket scientist or a Nobel Prize winner or a Rhodes scholar or a Steve Jobs (rest his soul). When you ask for help, some jokester will point you over to the “tool” section, which is a station built out of plywood that has a few tools attached to it with ridiculously short leashes. Try getting a 1.5 foot long tool leash to reach the end of a 6 foot long entertainment center. IMPOSSIBLE. It was a frustrating evening, and those employees are lucky that I do not know how to curse in Swedish.

However, searching Craigslist and thrift stores has yielded no fruit (or teak entertainment centers in my price range), and the temporary fix has lasted about 3 years. What is The Girl to do?  BUILD IT, obviously.

I had a lot of inspiration from a variety of sources, which I pinned with the caption “DIY this!” about 8 times. Here are a few of the items I was pining after (not pinning after – the world post-Pinterest is getting very confusing; also, click on pictures for their sources):

I fell head over heels for the first one, which was actually pretty affordable, but much too small to be an entertainment center. The metal frame with rustic wood shelves was exactly what I was hoping to achieve, and once I realized that I had a crap load of unfortunate-looking oak flooring taking up space in the garage, I knew I could DIY this! Oak flooring rejected by the factory + same oak flooring rejected by us for use as flooring = really “distressed” wood (a/k/a firewood). Some pieces were split, other looked like victims of a drive-by shooting, and yet more looked as though the planer had chewed them up and spit them out (which may actually have been the case).

I started furiously scouring casually browsing on Craigslist, and within a few days, the perfect shelving unit arrived. It was meant to be.

This is the actual photo from the ad. Dog was not included – yes, I asked. Owner was not amused.

I snagged this dirty and only slightly rusty unit for a mere $40. He wanted $50 but I showed up with all twenties and he didn’t have change (hint: works EVERY TIME). Just to give you guys an idea on the timeframe, I bought this in September. And just finished it last night. We may be slow, but we are [insert appropriate adjective here – determined? hard-working? stupid?].

I spray painted the shelving unit a hammered brown, to match the ceiling fan and curtain rod in the living room, and because I am just not a huge fan of shiny chrome, and also because I needed to cover some rust spots. After 6 1/2 cans of spray paint and many concerned looks from the Home Depot employees when I went back for “just one more can!” with my hands covered in spray paint and looking cracked out, the entire thing was covered in paint. I am pretty sure my boss thinks I am huffing paint. Please, Mr. Bossman, I would not resort to such cheap recreational drugs. I have standards.

The other step in this process involved making shelves out of wood flooring. This process is slow, because it requires gluing several together, clamping them to dry for several hours, and then continuing on, until I had four very large and rustic shelves.


Then I cut them down to size using the circular saw, and cut out squares on the corners (to fit inside the square legs) using the jig saw.


The Boy and I sanded them all, stained them all, and polyurethaned them all. I tried many different stains, including a homemade one, but finally settled on Weathered Oak by Minwax, and it turned out perfectly! (I am pretty sure we have EVERY color of Minwax stain and oil in our garage right now! See why here.)

At no point was The Boy enthusiastic about this project, but bless his little heart, he played along, and that is why I keep him around (because he is really good at sanding).

So here she is, in her new home, and I am thrilled with the results.

I need a better camera and some photography lessons stat, because these photos do not do Madonna justice. I asked The Boy what he thinks of her, and his response: “It is … very large?” He doesn’t get it, and I don’t care! Madonna and I will live happily ever after!

Oh! Madonna? Well, I had to come up with a name for something that was old, weathered, a little beat up, but still strangely attractive, with very hard and skinny appendages, who never ceases to be entertaining in some way.

Madonna.